Electronを動かしてHello world!表示するまで(macOS)
はじめに
ElectronはChromiumを利用してレンダリングを行い、Windows、macOS、Linuxの各プラットフォームで動作するデスクトップアプリを作成できます。Electronアプリはメインプロセスとレンダラープロセスに分かれており、メインプロセスはNode.jsのスクリプトを実行し、レンダラープロセスはHTML、CSS、JavaScriptで構成されたWebページを表示します。
開発環境
Node.js と npm
が既にインストールされてものとして進めます。
| パッケージ | バージョン |
|---|---|
| node | v22.4.1 |
| npm | 10.8.1 |
SCSSのコンパイルとかやっていれば、普通にインストール済みかと思います。
Electron のインストール
まず最初に、適当なテストディレクトリを作成しておきます。
$ mkdir HelloElectron
$ cd HelloElectron
次のコマンドで Electron をインストールします。
$ npm install --save-dev electronインストール後、npm init
を実行します。プロンプトの質問は、package名だけ electron
にして、他はすべてスルー(Enter)にしました。
$ npm init実行後、ディレクトリ内の package.json
の記述が更新されます。"scripts" 項目に
"start": "electron ." を追記しておきます。
{
  "devDependencies": {
    "electron": "^31.3.1"
  },
  "name": "electron",
  "version": "1.0.0",
  "main": "index.js",
  "dependencies": {
    "boolean": "^3.2.0",
    "buffer-crc32": "^0.2.13",
 ...
  },
  "scripts": {
    "start": "electron .", // ← ここを追記
    "test": "echo \"Error: no test specified\" && exit 1"
  },
  "author": "",
  "license": "ISC",
  "description": ""
}
index.js の用意
const { app, BrowserWindow } = require('electron')

const createWindow = () => {
  const mainWindow = new BrowserWindow({
    width: 800,
    height: 600,
  })
  mainWindow.loadFile('index.html')
}

app.whenReady().then(() => {
  createWindow()
})
index.html の用意
先ほどの index.js
からロードされるhtmlファイルを用意しておきます。
<!DOCTYPE html>
<html>
  <head>
    <meta charset="UTF-8">
    <title>Hello World!</title>
  </head>
  <body>
    <h1>Hello World!</h1>
  </body>
</html>
アプリの起動
以下コマンドで、アプリを起動します。
$ npm startネイティブなアプリ画面が現れ「Hello world !」が表示されました。 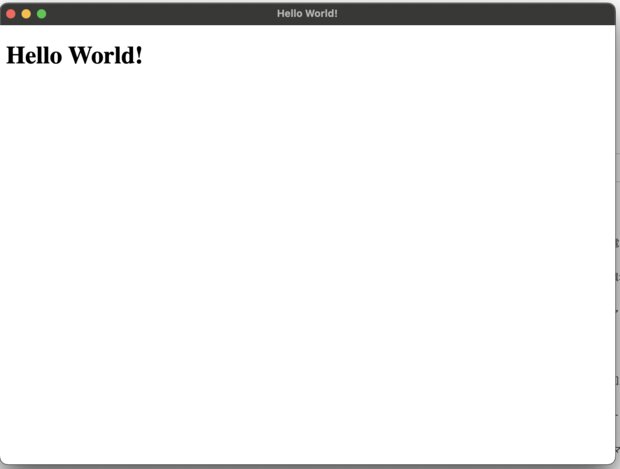
Electron は WebViewと何が違うの?
正直ここまでで、Electron は WebViewと何が違うの?と思ってしまいました。調べるところによると、Electronアプリは単純にWebViewでWebコンテンツを表示するだけではなく、次のような特徴を持っています。
ElectronはNode.jsを統合しているため、バックエンドでNode.jsの機能を利用することができます。これにより、ファイルシステムへのアクセスやOSのネイティブ機能の利用が可能です。メインプロセスとレンダラープロセス間でメッセージをやり取りするためのIPCメカニズムを提供しています。これにより、メインプロセスで実行されるNode.jsコードとレンダラープロセスで実行されるWebコンテンツが連携できます。Electronはデスクトップアプリに特化した多くのAPIを提供しており、システムトレイ、メニュー、通知、クリップボードアクセス、ウィンドウ管理など、さまざまな機能を簡単に実装できます。
IPC(プロセス間通信)を使ってファイルシステムへアクセスする
Electronでテキストをファイルとして保存するアプリを作ってみます。
main.js に以下を記述します。
const { app, BrowserWindow, ipcMain, dialog } = require('electron');
const fs = require('fs');
const path = require('path');

function createWindow() {
  const win = new BrowserWindow({
    width: 800,
    height: 600,
    webPreferences: {
      preload: path.join(__dirname, 'preload.js'),
    }
  });

  win.loadFile('index.html');
  win.webContents.openDevTools();
}

app.whenReady().then(createWindow);

app.on('window-all-closed', () => {
  if (process.platform !== 'darwin') {
    app.quit();
  }
});

app.on('activate', () => {
  if (BrowserWindow.getAllWindows().length === 0) {
    createWindow();
  }
});

ipcMain.on('save-file', async (event, data) => {
  const result = await dialog.showSaveDialog({
    title: 'Save File',
    defaultPath: path.join(__dirname, 'default.txt'),
    buttonLabel: 'Save',
    filters: [
      { name: 'Text Files', extensions: ['txt'] },
      { name: 'All Files', extensions: ['*'] }
    ]
  });

  if (!result.canceled) {
    fs.writeFile(result.filePath.toString(), data, (err) => {
      if (err) {
        console.error('File Save Error:', err);
        event.reply('save-file-response', 'error');
      } else {
        console.log('File Saved Successfully');
        event.reply('save-file-response', 'success');
      }
    });
  } else {
    event.reply('save-file-response', 'canceled');
  }
});
Electronでは、contextBridgeとpreload.jsを使って、メインプロセスからレンダラープロセスに安全にデータを渡す方法が推奨されています。そのため
preload.js を用意して、以下を記述します。
const { contextBridge, ipcRenderer } = require('electron');

contextBridge.exposeInMainWorld('electron', {
  saveFile: (content) => ipcRenderer.send('save-file', content),
  onSaveFileResponse: (callback) => ipcRenderer.on('save-file-response', callback),
});
最後に index.html を以下のように記述します。
<!DOCTYPE html>
<html>
<head>
  <title>Electron Save File</title>
</head>
<body>
  <h1>Electron Save File Example</h1>
  <textarea id="content" rows="10" cols="30"></textarea>
  <br>
  <button id="saveButton">Save File</button>

  <script>

    document.getElementById('saveButton').addEventListener('click', () => {
      const content = document.getElementById('content').value;
      window.electron.saveFile(content);
    });

    window.electron.onSaveFileResponse((event, status) => {
      if (status === 'success') {
        alert('File saved successfully!');
      } else if (status === 'error') {
        alert('Error saving file.');
      } else if (status === 'canceled') {
        alert('File save canceled.');
      }
    });
  </script>
</body>
</html>
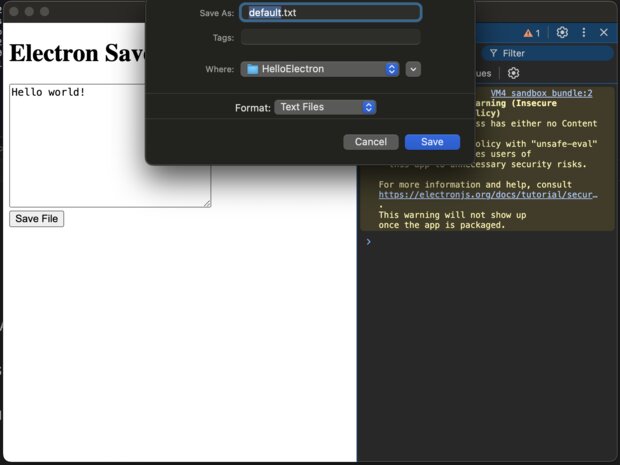
アプリを起動すると、下図のようにファイルシステムへアクセスしてテキスト保存できるようになります。また、ElectronはChromiumベースなので、win.webContents.openDevTools();
を記述することで、Chromeに搭載されているような開発者ツールを表示することが可能です。
JSからTSへ移行する流れ
試作したElectronアプリを、JavaScript から TypeScript へ書き換えてみました。
- Electronアプリで作成したjsとhtmlファイルをsrcへ移動
- jsファイルは拡張子をtsへ変更(内容も適宜変更)
- tsconfig.jsonを用意する
- package.jsonを修正する
$ tree -I node_modules
.
├── default.txt
├── dist
│   ├── index.html
│   ├── main.js
│   └── preload.js
├── package-lock.json
├── package.json
├── src
│   ├── index.html
│   ├── main.ts
│   └── preload.ts
└── tsconfig.json
JSからTSへ移行する手順
それでは既存のElectronプロジェクトをTypeScriptに移行していきます。
TypeScriptのインストール
プロジェクトディレクトリで以下のコマンドを実行して、TypeScriptをインストールします。
npm install --save-dev typescripttsconfig.jsonの作成
プロジェクトのルートディレクトリにtsconfig.jsonファイルを作成し、以下の内容を追加します。
{
  "compilerOptions": {
    "target": "ES6",
    "module": "commonjs",
    "strict": true,
    "esModuleInterop": true,
    "outDir": "./dist",
    "rootDir": "./src",
    "resolveJsonModule": true,
    "noImplicitAny": true,
    "moduleResolution": "node",
    "skipLibCheck": true
  },
  "include": ["src/**/*.ts"],
  "exclude": ["node_modules", "dist"]
}
プロジェクト構造の変更
JavaScriptファイルをTypeScriptファイルにリネームします。例えば、main.jsをmain.tsに変更します。src
ディレクトリも作成し、そこへソースコードを移動させておきます。
ビルドスクリプトの設定
package.jsonにビルドとコピーのスクリプトを追加します。ここではcopyfilesパッケージを使用して、HTMLファイルをコピーします。
npm install --save-dev copyfiles次に、package.jsonのスクリプトセクションを以下のように更新します。
  "scripts": {
    "build": "tsc && npm run copy-html",
    "copy-html": "copyfiles -u 1 src/*.html dist",
    "start": "npm run build && electron ./dist/main.js"
  },
必要な型定義パッケージのインストール
Electronの型定義パッケージをインストールします。
npm install --save-dev @types/node @types/electronソースコードの修正
TypeScriptの型定義に従って、ソースコードを修正します。例えば、requireを使用している部分をimportに置き換えるなど。
// src/main.ts
import {app, BrowserWindow, ipcMain, dialog} from 'electron';
import fs from 'fs';
import path from 'path';

function createWindow() {
  const win = new BrowserWindow({
    width: 800,
    height: 600,
    webPreferences: {
      preload: path.join(__dirname, 'preload.js'),
    }
  });

  win.loadFile('index.html');
  win.webContents.openDevTools();
}

app.whenReady().then(createWindow);

app.on('window-all-closed', () => {
  if (process.platform !== 'darwin') {
    app.quit();
  }
});

app.on('activate', () => {
  if (BrowserWindow.getAllWindows().length === 0) {
    createWindow();
  }
});

ipcMain.on('save-file', async (event: { reply: (arg0: string, arg1: string) => void; }, data: any) => {
  const result = await dialog.showSaveDialog({
    title: 'Save File',
    defaultPath: path.join(__dirname, 'default.txt'),
    buttonLabel: 'Save',
    filters: [
      { name: 'Text Files', extensions: ['txt'] },
      { name: 'All Files', extensions: ['*'] }
    ]
  });

  if (!result.canceled) {
    fs.writeFile(result.filePath.toString(), data, (err: any) => {
      if (err) {
        console.error('File Save Error:', err);
        event.reply('save-file-response', 'error');
      } else {
        console.log('File Saved Successfully');
        event.reply('save-file-response', 'success');
      }
    });
  } else {
    event.reply('save-file-response', 'canceled');
  }
});
また、型指定ができるようになるので、WebStormなどのIDEの機能を使って内容を適宜修正します。
// src/preload.ts
import {contextBridge, ipcRenderer} from 'electron';

contextBridge.exposeInMainWorld('electron', {
  saveFile: (content: any) => ipcRenderer.send('save-file', content),
  onSaveFileResponse: (callback: (event: Electron.IpcRendererEvent, ...args: any[]) => void) => ipcRenderer.on('save-file-response', callback),
});
プロジェクトのビルドと実行
以下のコマンドでプロジェクトをビルドし、Electronアプリを実行します。
npm run startこれで、既存のElectronプロジェクトをTypeScriptに移行する基本的な手順は完了です。